Showing posts with label Tutorials. Show all posts

Saturday, March 21, 2015

Jammie Dodgers Recipe from Kaye's Cupboard

I have a very special "treat" for your all today! Kayla, from Kaye's Cupboard, is guest posting today a yummy, nerdy recipe that is perfect to go along with the new Timey-Wimey TARDIS Pinafore! I'm super excited, because Kayla just happens to be my awesome sister-in-law, she is a Doctor Who fan too, and her recipe just look delicious! I won't give away any "spoilers" though, so I'll now turn it over to Kayla!

Hello everyone! I'm Kayla from Kaye's Cupboard. I love to find and try out new foods, and I enjoy sharing delicious recipes with friends and family! I started my blog as a way to keep track of my family's most favorite dishes, focusing mainly on simple, fairly easy crowd-pleasers.
I have been so excited about this collaboration with my amazing sister-in-law!! Her enthusiasm about Doctor Who is a big reason why I started watching at all, and I'm very glad I did! 


Eleven once told the Daleks a Jammie Dodger was a self-destruct button. It didn't fool them for a minute, but that didn't stop him from enjoying the cookie anyway! I've heard of British "biscuits," but never actually tried any. This is an excellent place to start, it seems! 


Very similar to shortbread cookies, but without any of the dry, crumbly texture, these cookies are lighter and flakier with a slight buttery taste. These beauties can be filled with whatever jam your heart desires. We preferred strawberry over grape, but we will definitely try others! I think blackberry would be delicious! With a sprinkling of sugar on both halves of the cookie, the overall combination of textures and flavors is perfect!


Simplicity is such a great thing in this case, because it allows you to truly enjoy each component. It's making my mouth water, just thinking about it! My husband I both had the same idea- we want to make this cookie part of a holiday so that we have a reason to make it at least once a year...although I suspect we will make it much more often than that, especially since they are simple to make, and we always have the few ingredients they need!

  • 1 cup butter, softened
  • 1  1/8 cup powdered sugar
  • 1 tsp vanilla
  • 1 egg yolk
  • 3 cup flour
  • sugar, for sprinkling
  • 1  1/2 cups jam
1. Combine butter and powdered sugar in a large bowl until fluffy. Add vanilla and egg yolk and mix with a wooden spoon. Mix in flour, then form dough in to a smooth ball. Wrap in plastic wrap and refrigerate 1 hour.

2. Preheat oven to 375. Spray baking sheets with cooking spray. Place dough on a lightly floured surface, and roll to 3mm thickness. Cut out an even number of large circles with a cookie cutter. Use a small cookie cutter to cut out the center of half of the cookies.

3. Place them on the baking sheet and bake for 10-12 minutes, or until they are a pale golden color. Be careful not to over-bake. Transfer to a wire rack to finish cooling, and sprinkle with sugar while still warm. Once they are completely cool, turn cookies with no cut-out upside down, spread about a teaspoon of jam on them, then top with cookie that has a cut-out. Cookies can be stored in an air-tight container.


{Kudos to jamieoliver.com!}

Thursday, November 13, 2014

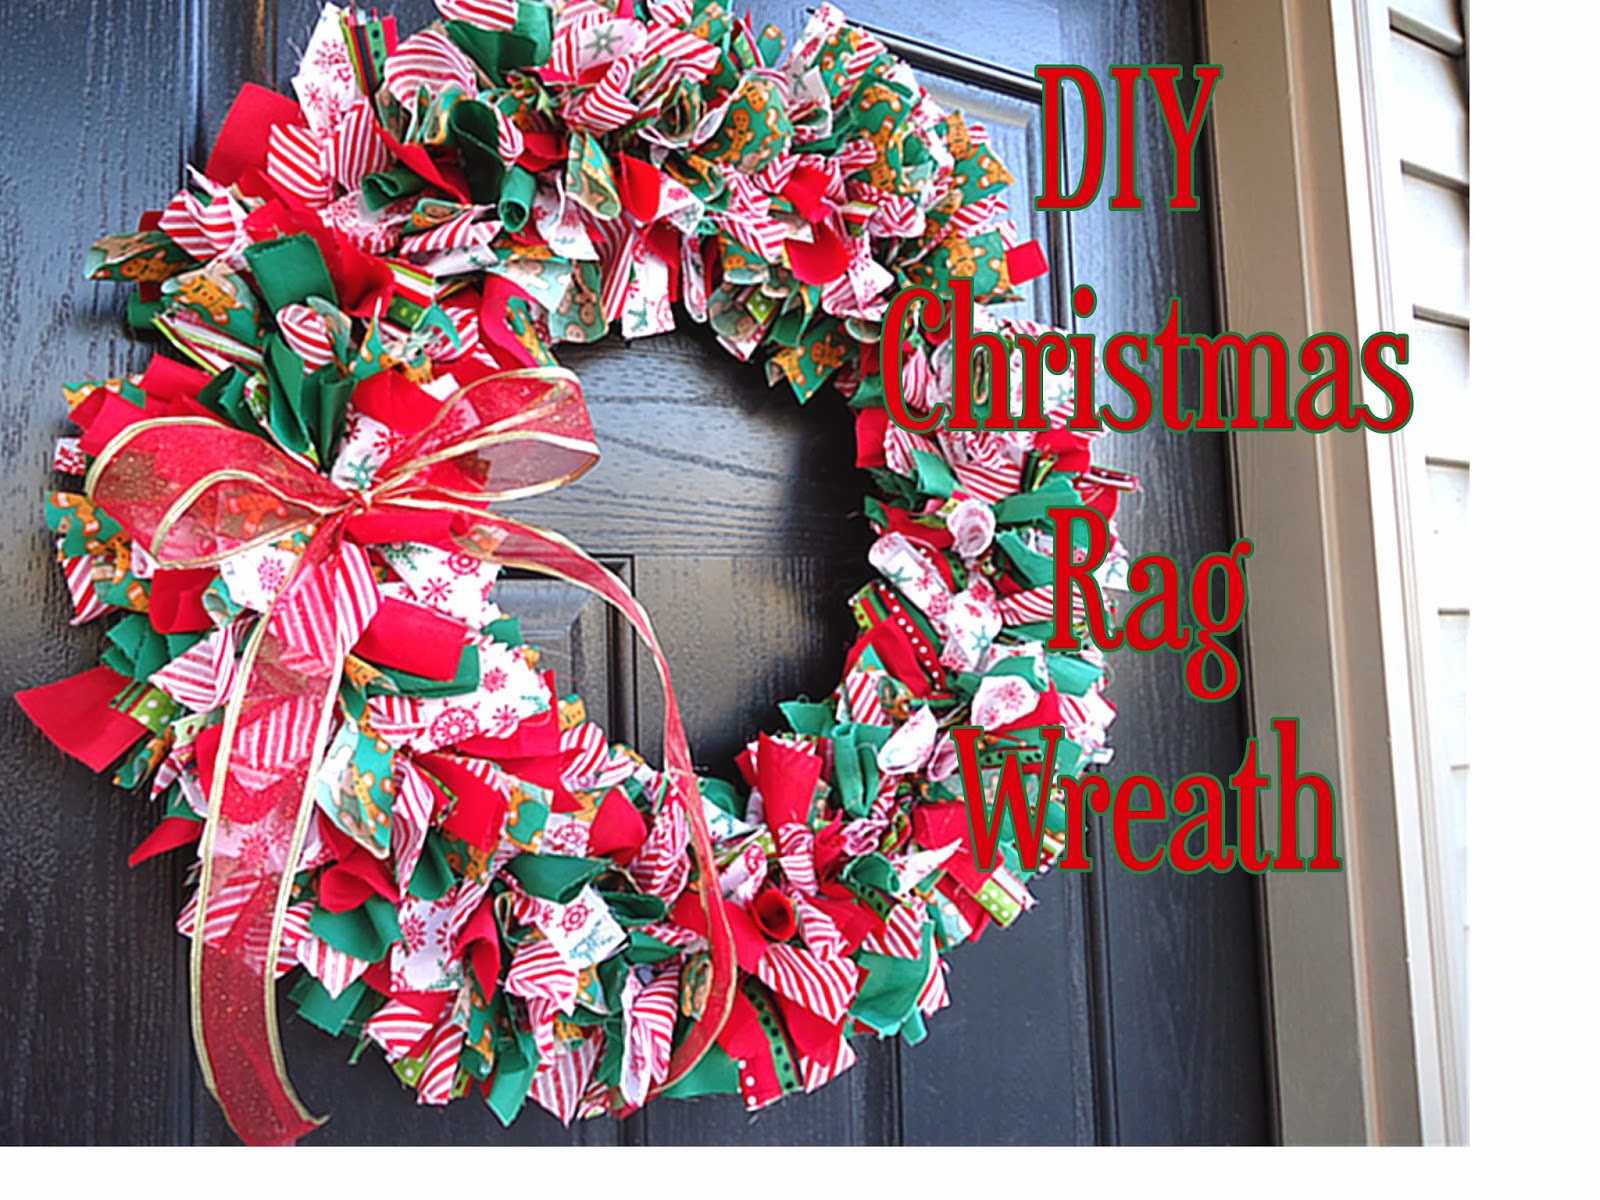
Christmas Rag Wreath Tutorial

Hellooooo everyone! It's time for another tutorial! Although this one has nothing to do with nerdiness whatsoever, I figured it would be nice to share something for the holidays. :) And this is sooooo easy too and can totally be done while multitasking (like watching Dr. Who, haha!)

Here's what you'll need:

          -A 4 wire wreath form (just a few dollars from any craft store)
          -Scissors or a rotary cutter (I would go with the cutter, if you have one. They are soooooo nice for doing straight lines, just like you'll need to in this project).
          -Ribbon
          -Approximately 3+ yards of fabric (I'm sorry I don't have an exactness on this one. I used some scraps, and bought some of the material. I ended up having to go back to the store to get more, and I unfortunately didn't keep track of how much I got. :( It also depends on how full you want your wreath to be. I wanted mine pretty full, so I ended up needing quite a bit more material than I thought I would).

1.) Lay out your material and cut strips measuring 8 inches long by 2 inches wide.


2.) Once you have all of your strips cut out, start tying them onto the outside ring of the wreath form. I tied them on in a pattern to make sure everything looked even. Make sure to tie them in only one knot. After the first row, move on to the second, and then the third. I actually skipped the fourth row since my wreath was looking just fine without it, and I'm glad I did! Another row would have been a bit too much I think. :)

3.) Make sure to turn on some kind of entertainment while you are tying. Some great choices are My Little Pony, Enchanted, Dr. Who, Full-Metal Alchemist, Harry Potter, just to name a few. ;)

4.) Once you've tied on everything, fluff it and straighten it all out so that it all looks nice. Then add a decorative bow, and you're all done!


Super easy project, ins't it? And it looks just lovely! I'm so excited for Christmas and I can't wait to show it off! :) Thanks for checking out the tutorial! Happy crafting! :)


Friday, October 24, 2014

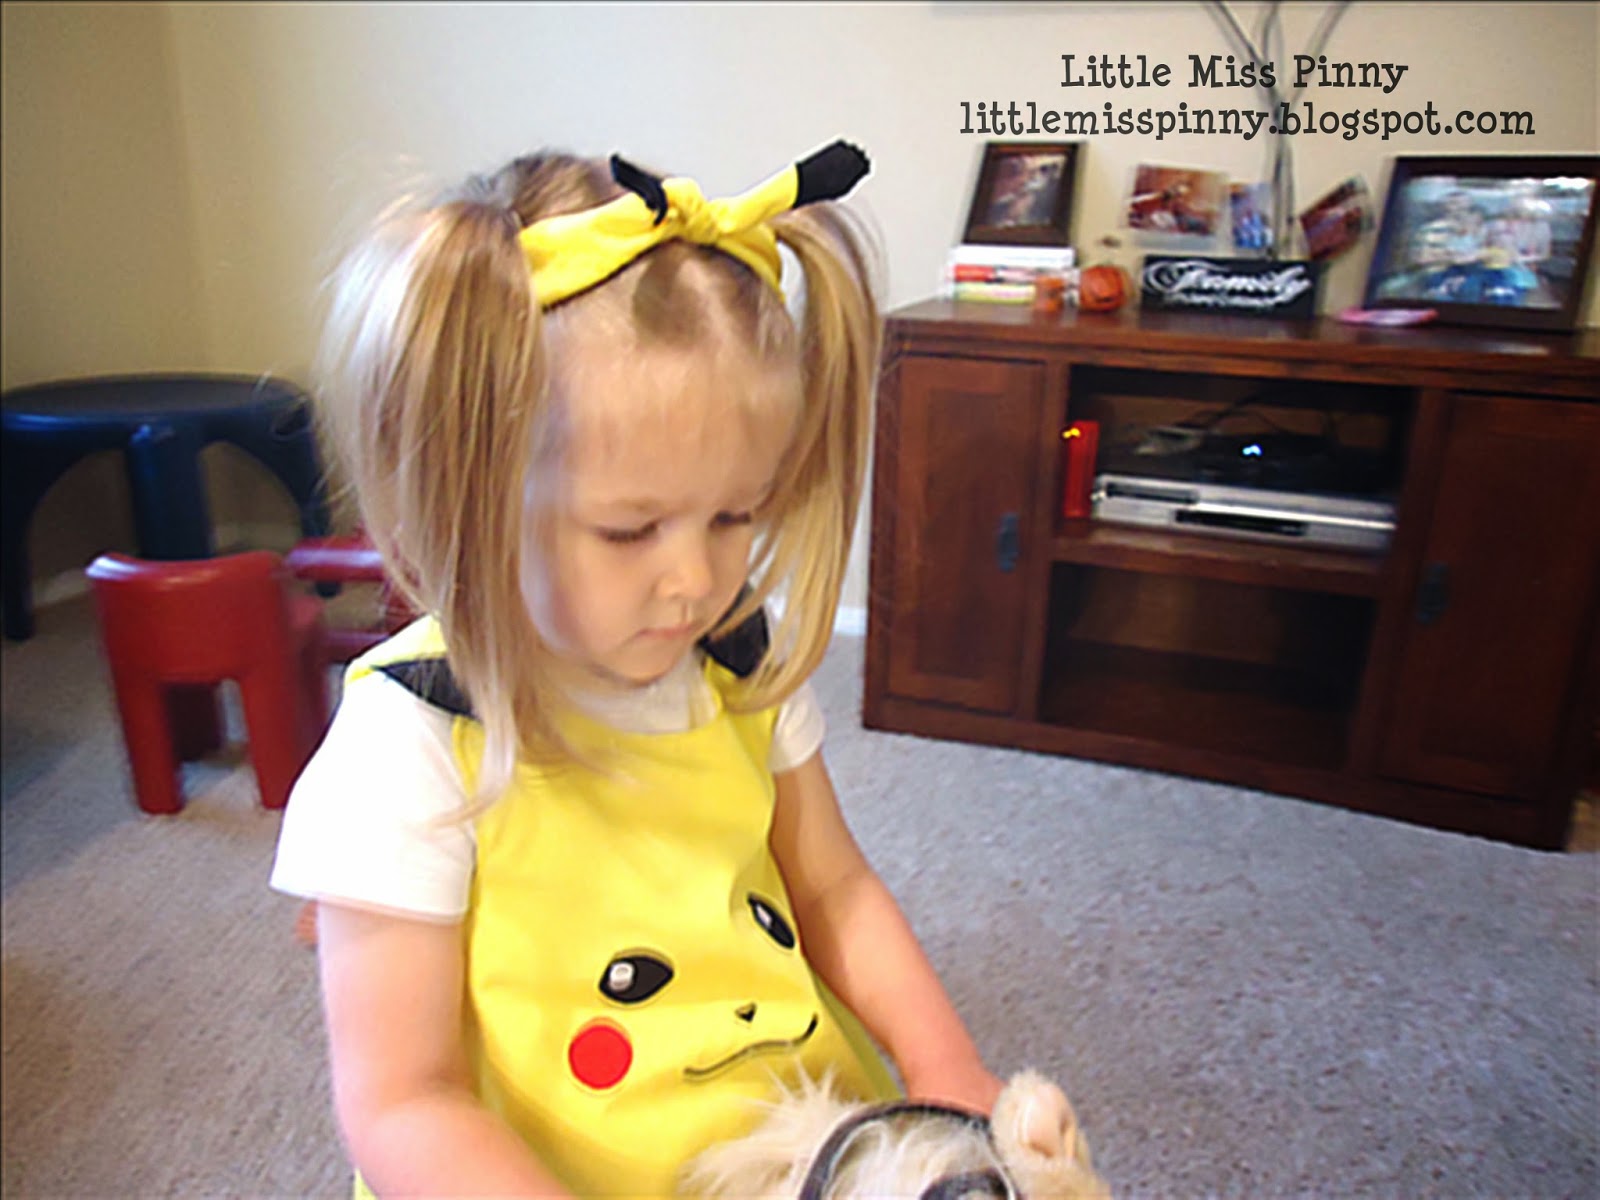
Pikachu Bandanna Tutorial

With the recent introduction of the Playful Pikachu pinafore, I thought I would make a tutorial on how to make something to go along with this pinny for an everyday look. I thought up this fun idea for a bandanna that can be worn as a headband! The black tips resemble Pikachu's ears, which is just too cute!


Here's what you'll need:
          Yellow fabric (it will need to be cut into a 20x20 in. square, so make sure you have enough to do that).
          Black fabric (you will only need a very small amount. You could use scrap fabric if you have some)
          Yellow thread
          Black thread
          Sewing Machine
          Sewing Scissors
          Serger (Optional)

(Before we start, I just have to apologize for the lack of actually good pictures. I had to do this one late at night and in a bit of a hurry. :P Sorry about that. The end result is great looking though, I promise!)

1.) To begin, cut out a large square of yellow fabric measuring 20 inches by 20 inches. Snip off a small amount from two opposite corners of your fabric. This is where you'll put the black fabric for the tips of the "ears."


2.) Take those yellow corners that you snipped off, and use them as a guide to cut out two triangles from your black fabric. Be sure to add a little extra to the bottom of your triangle to compensate for seam allowance.

3.) Pin the black fabric to your yellow and sew down.


Your fabric should look like this when you're done sewing.


4.) You have a couple different options for this next part. You can either select a setting on your machine that is a zig-zag stitch, or use a serger. I don't have a serger, so I used my sewing machine. I actually have a stitch on my machine that looks similar to what a serger does, so that's what I went with. 
Sew/serge along the entire outside of the fabric so that there are no more raw edges. Make sure you go around the black first with your black thread and then the yellow with your yellow thread. 


5.) After that, grab both of the black corners and fold your fabric into a triangle. 


6.) Fold the bottom of the triangle up about an inch or two and continue to roll it up until you reach the tip.


7.) Tie it on your little cutie's head in a knot and you're done!


This version is a very fast and simple one. If you'd rather something that looks a little nicer, you can make two of these and sew them both together. That prevents you from having any raw edges to deal with, but it does take extra fabric and time (which I didn't have either), so I'll leave it up to you. :)


Now she's ready to go and chatch 'em all! ;)

Tuesday, October 7, 2014

Star Power Bow Tutorial (For Mario and Luigi Pinafores)

I'm so excited to share my first tutorial with you guys! As I was thinking of what I could do, I thought it would be really fun to show you all how to make something to go along with the Pinny(s) of the Month- Marvelous Mario and Little Luigi! 

As I have mentioned on this blog, the pinafores I make can be worn for costumes and/or for everyday wear. I've already demonstrated how they can be worn as costumes in the post that introduced the two pinafores, but I think that this tutorial will be good to give you ideas on how you can make them into something to wear anywhere too! :)

Here's what we'll be making today: 


Totally cute, no? ;) This can also be done with red felt too if you wanted to make it for Mario. I just went with Luigi because, personally, I kind of like Luigi more, and I don't think he gets enough love. ;)

What you'll need:

          Green Felt
          Yellow Felt
          Stiff Black Felt (you can use the regular felt that's a little more floppy, but the stiff kind will be much easier to use)
          Fabric Pen (with disappearing ink)
          Sewing Scissors
          Hot glue gun
          Star shape (I used a small, plastic, glow-in-the-dark star from my daughter's ceiling. You can use something similar, or you can trace an image from a picture and cut it out. Anything that will be a good template to trace, and the size you want)
          Hair clip or headband 

1.) Cut out a strip from your green felt. Mine measured approximately 1.5 inches by 6.5 inches.  


2.) Cut out another green felt strip, but smaller. Mine was approximately .5 inches by 3.5 inches.


3.) Lay your star shape flat on your yellow felt and trace around it with your fabric pen. (Fabric pens are great for marking fabric since the ink will disappear when you wash it or within 24 hours or so). 


Now you have three pieces that don't look anything like a bow, but they will! 


4.) Take the bigger of the felt strips and fold the ends together, one on top of the other. Glue these together so that they hold. 


It should look like this after you've glued. :)


5.) Next, pinch the middle together so that it resembles a bow. This isn't necessary really, but it does help you to see how you want your bow to look when it's finished and it creases it so that the next step is easier. (Please forgive me for the horrible way that ruler in the back looks. I didn't notice it until after I had taken all of the pictures and finished the bow).


6.) Next, place the smaller strip around the bow. This will be the middle. Trim off the excess ends, but leave enough so that you can glue those ends together just like you did with the bigger strip. Glue the ends together while keeping the small strip tight around the bow. 


7.) Set the bow aside. Next, we'll be making little eyes for the star power! Cut a small piece from your stiff black felt, and then cut out very small ovals. You can use a pair of tweezers to help hold the felt so that you can get a nicely shaped and tiny oval. This part is just a little tricky, so if you'd rather skip it, that's fine! Although the eyes do make it look more like the star from Mario Bros., it will still look great! :)


8.) Carefully put a small dot of glue on the eyes (one at a time) and place them on the star. 


9.) After that, put a small dab of glue on the back of the star and place it gently in the middle of the bow (if you press it down, you'll see the glue through the yellow fabric and your little star will look funny). Then glue the entire bow onto a hair clip or a headband.


And you're done! Super easy and fun, huh? :)


Now dress up your little cutie and enjoy! 


Hope you enjoyed the tutorial! If you would like one of these with your order, send me an email! I would be happy to include one for you! :)

Thursday, September 18, 2014

Tutorials

I'll be posting tutorials for different projects from time to time, so check back often to see whats new! :)